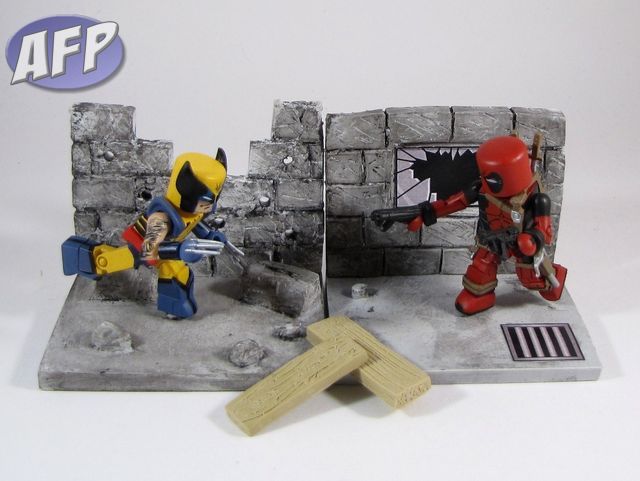
Luke’s Toy Store, who started a sponsorship campaign with us at the start of the year, sent over a set of their Mini-Figure Dioramas, including the Broken Wall and Broken Window sets. I told Luke before he dropped the package in the mail that I’d be speaking my mind, and he was fine with that. So let’s take a look!
I wasn’t sure what to expect in terms of packaging and contents – Luke’s is a family-run business – but I was impressed with what I received. Each diorama was packed in a ziplock bag with a heavy cardstock four-color label depicting the final product. Inside, the parts of the diorama and an instruction sheet, again printed clearly on heavy cardstock.
The Broken Window diorama also comes with 2 wooden plank accessories and a sticker sheet. The stickers give you three options for the recessed window area (a broken window, a barred window, and an intact window) and a grate for the floor. Silly me – I didn’t think to take a picture of the sticker sheet until after I had assembled the sets.
Speaking of assembly, it’s a pretty simple 3 steps. First, you scuff up the bottom of the wall piece and the area on the floor where you’re going to glue it. I used an exacto for that, but you could use scissors or a screwdriver if you only have those handy. Second, you apply some super glue. And third, you hold it together until it’s set.
The instructions recommend that you do both sets at the same time if you’re going to use them together, so that the walls are upright at the same angle. No need for that – I just propped the pieces against a spare box I had handy when I was gluing them together, and that ensured a right angle from the floor to the wall.
Here’s my only big criticism – I’d really have liked it if the diorama parts had a tongue and groove system to take the guess work out of gluing the pieces together and add to the stability of the dioramas. After assembling the pieces according to the instructions, I applied a few layers of clear nail polish to the connection point in the back of the diorama just to give it a more secure bond.
Finally, on the Broken Window set, you cut out the stickers, peel the backing, and apply them to the diorama. I actually did this first to make attaching the stickers easier.
The resulting dioramas are very nice looking. The walls and floors are cast in gray, but have had a black paint wash applied to bring out the sculpted grooves and textures, particularly in the walls. The wooden planks from the Broken Window set are cast in tan and also have a nice wood grain texture in them – they could have used a wash to bring out that detail a bit more.
Each of the floor pieces come with two pegs that fit the peg holes that DST added to their Minimates a long time ago. The Broken Window set also includes a peg just below the window on the right side. I found all the pegs a bit of a snug fit and took a fair amount of pressure to get them inserted into a Minimates foot – this was most concerning with the wall peg, because I was concerned about breaking apart the diorama – but with care I did not. This is, however, preferable to a peg that’s too loose, because that would serve no purpose at all.
After adding in some Minimates, I saw how these pieces really spruce up a display. The pegs allow you to place figures in dynamic action poses, and the dioramas function to enhance the setups without detracting from the figures themselves. I’ve gotten so used to taking pictures against a blank white backdrop that I’ve forgotten how much a little piece of scenery can do.
You can pick up each of these dioramas for around the price of a 2-pack of Minimates. The Broken Wall and Broken Window sets are available for $7.99 each, and you can buy them both in a combo for a special price of $14.50. Make sure to tell Luke that Ron sent you! 😀


One thought on “Mini-Figure Broken Wall and Broken Window Dioramas”
Comments are closed.